

Synology Photos & Drive with Custom Domain and SSL Setup
Google has great product suite, but the cost of it is an obscene amount of data. This guide-ical is a step in my partial de-googling journey. Synology Photos and Drive have both been installed and configured prior to the below.
For better security, a more professional look, and ease of access I wasnted to make my Synology services (Drive and Photos) accessible externally without a VPN setup. This would involve a DDNS host (free and only necessary if a dynamic IP is in use), a new custom domain (£) and time (free, from a certain point of view).
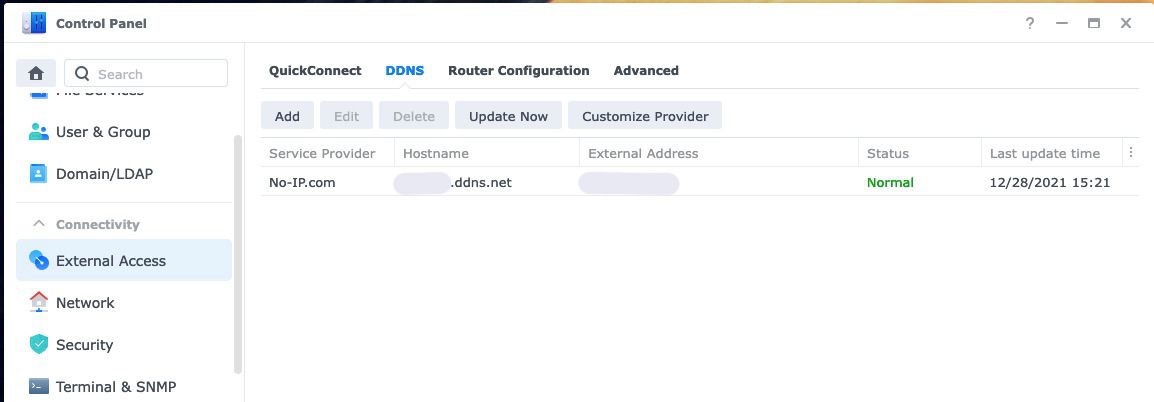
I setup a No-IP hostname for DDNS, and used Synology's built-in DDNS to configure this so no additional installations had to be made and API Keys dug out at all. It is pretty much a straight forward account creation, then signing in on the DSM page (Control Panel > Extenal Access > DDNS > Add), which left me with this:
The simplest, and most costly, is buying the domain. I used Namecheap to buy my domains and have kept the nameservers with them for the timebeing. As this domain is not going to be used for email, a catchall forwarder was set.
Next was to setup the CNAME entries for the domain to point towards the DDNS host. I created one for each of the two services I wanted to expose: drive and photos, with both pointing towards the newly created DDNS entry.

Following this, port forwarding needed to be configured on the router to allow traffic looking at the domain to be directed to the Synology and not just dropped when it hit the router. (With the TalkTalk router that is in use, the port forwarding settings are found in See Internet Settings > Manage Advanced Settings > Access Control). HTTP and HTTPS traffic was forwarded to the NAS (which itself is on a static internal IP).
The next step is to install the SSL certificate. There are several options, but the easiest and cheapest is getting a certificate from Let's Encrypt via the Synology GUI (Control Panel > Security > Certifcate). Entering the two subdomains set as CNAME entries earlier and an email address associated with the domain (forwarded to an actual mailbox, as mentioned earlier) was all that was needed.

With the end now in sight, the next step is to configure the application settings (Login Portal > Applications) with the new domain. An alias should be added to tidy things up and the domain. Enabling HSTS for a more secure connection is recommended and then disable the HTTP port forward rule on the router as it would no longer be used (less is more with security).
Finally, I went back to the certificate settings menu to apply the new certificate to the Synology Photos and Drive.
Next to test: worked fine on mobile data (albeit slowly because I perpetually have no signal) but on the LAN... Nope.
I have lurked long enough on r/sysadmin to know that it is always DNS. I signed into my PiHole instance to add a new couple of local DNS records, which resolved the issue.

For sharing links, it seems that the DDNS host FQDN address is used in lieu of the custom domain that has been setup. This can be manually switched out when sharing the links and appears to be an issue with the software itself.
Prior to setting this up, the security of the NAS was increased: MFA, firewall rules, location blocking and others. More information can be found here and here. The steps taken were adapted from this KB and this guide.